This post is going to show a basic initial configuration for Barracuda CloudGen Firewall F12.
Related Post:
Diagram
Hardware Specification
| Interface | |
|---|---|
RJ45 Ethernet NICs | 5x10/100/1000 |
| USB 3.0 | 2 |
| Serial console | 1 [RJ45] |
| System | |
| CPU | Intel Apollo Lake |
| RAM [GB] | 2 |
| Mass Storage | |
| Type | SSD |
| Size [GB] | 80 or better |
| Size, Weight, Dimensions | |
| Appliance weight | 2,0 kg / 4.4 lbs |
| Carton weight with appliance | 3,5 kg / 7.7 lbs |
| Appliance size: width x depth x height |
|
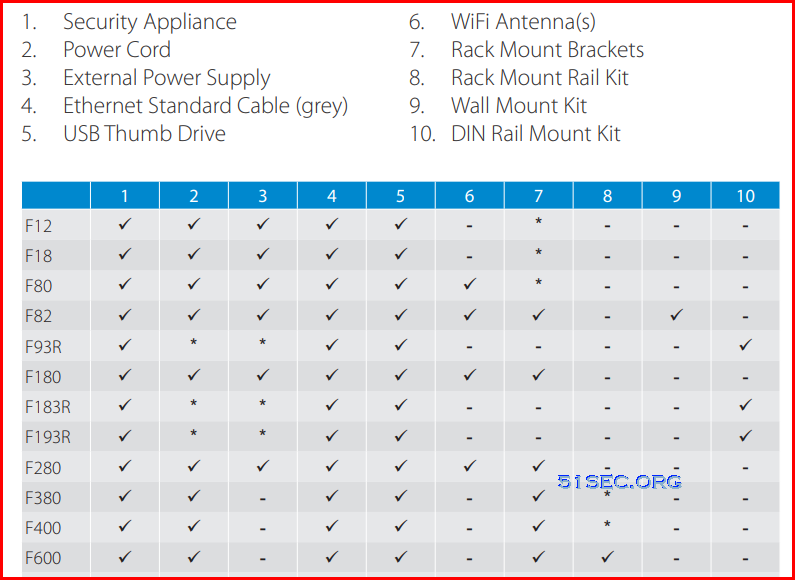
What is in the box?
Every F-Series Firewall is shipped with the Quick Start Guide. Complete all the steps listed in the guide for the Standard Deployment Mode.
DEMO Mode
Some notes for Demo mode :
Barracuda NG Firewalls provide firewall, VPN and L7AP functionality in DEMO MODE to be used for evaluation and training purposes without a license, but this includes severe restrictions con-cerning security. The default root password of ngf1r3wall will always work and no access control lists (ACL) from where remote login is permissible can be set up. Encryption of a VPN tunnel is lim-ited to 56 bit keys. As long as no valid Barracuda NG Firewall license files are imported, the system will remain in DEMO MODE and must not be used for production environments.
New version of firewalls can change the root password in Demo mode. Once changed, default password is not working anymore.
Please note that security options like Web Filter, Malware Protection and Web Security always require a valid license.
The admin must consider the following: the RSA key and the certificate (CN=Barracuda Networks AG) are created if no explicit root certificate is configured. However, they are available only until the next boxfw process restarts, are insecure (it is a 512-bit key), and cannot be exported for use as clients as a trusted anchor.
An explicit root certificate must be created/configured to ensure a productive system.
Connecting Cables
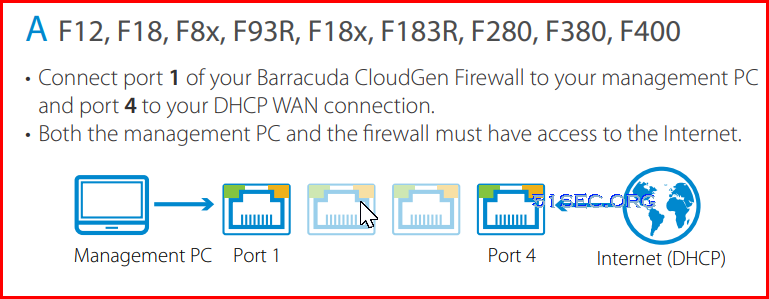
1. Connect Power Cable
2. Connect Port 1 with a mgmt PC for mgmt access (192.168.2.200)
3. Connect Port 4 with a modem / router for WAN access
Use Firewall Admin Software to Access Firewall
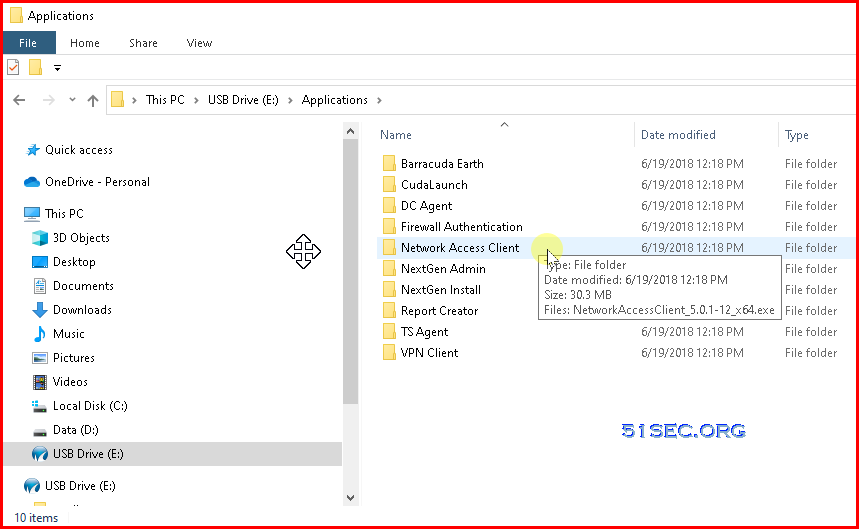
Get Firewall Admin Software from USB Key or Download it online
There is no Web Interface for F12 model. We will have to use Firewall Admin (F12 to F1000) – Firewall Admin is a stand-alone Microsoft
Windows application for managing all CloudGen Firewall models. A copy of
Firewall Admin is included on the USB flash drive delivered with your unit. It has better to use same version of Firewall Admin software as your firewall firmware is.
Copy NGAdmin_7.1.3-050.exe to your local mgmt pc and double click to run it
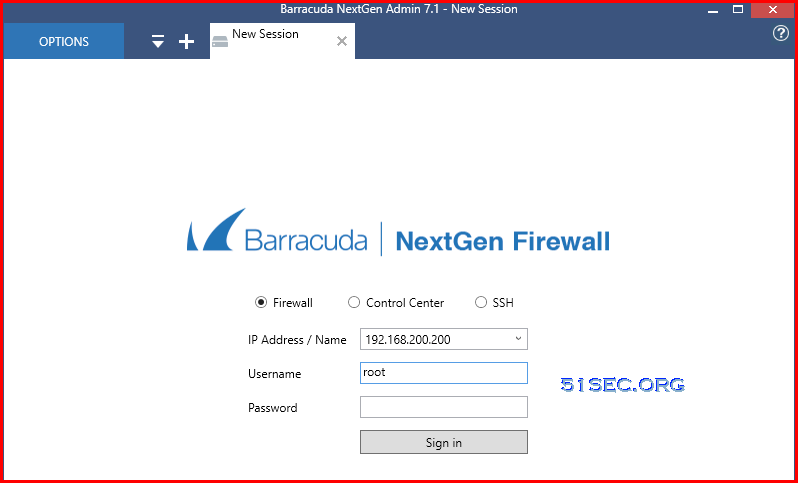
Default username and password
Management IP / URL: 192.168.200.200 or https://192.168.200.200
Username: root
Password: ngf1r3wall
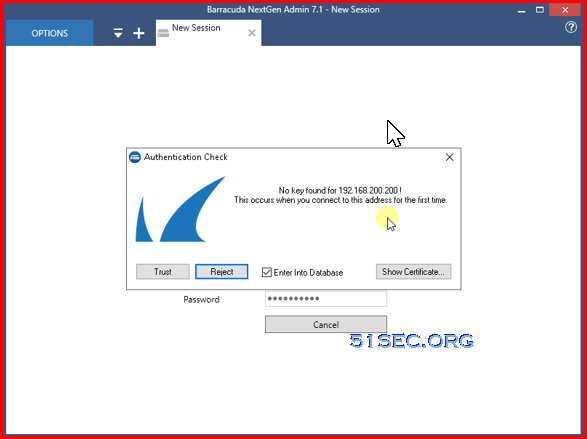
First time to run, you will get a authentication check message since there is new key need to be trusted from your firewall. Choose Trust to aovid seeing it again.
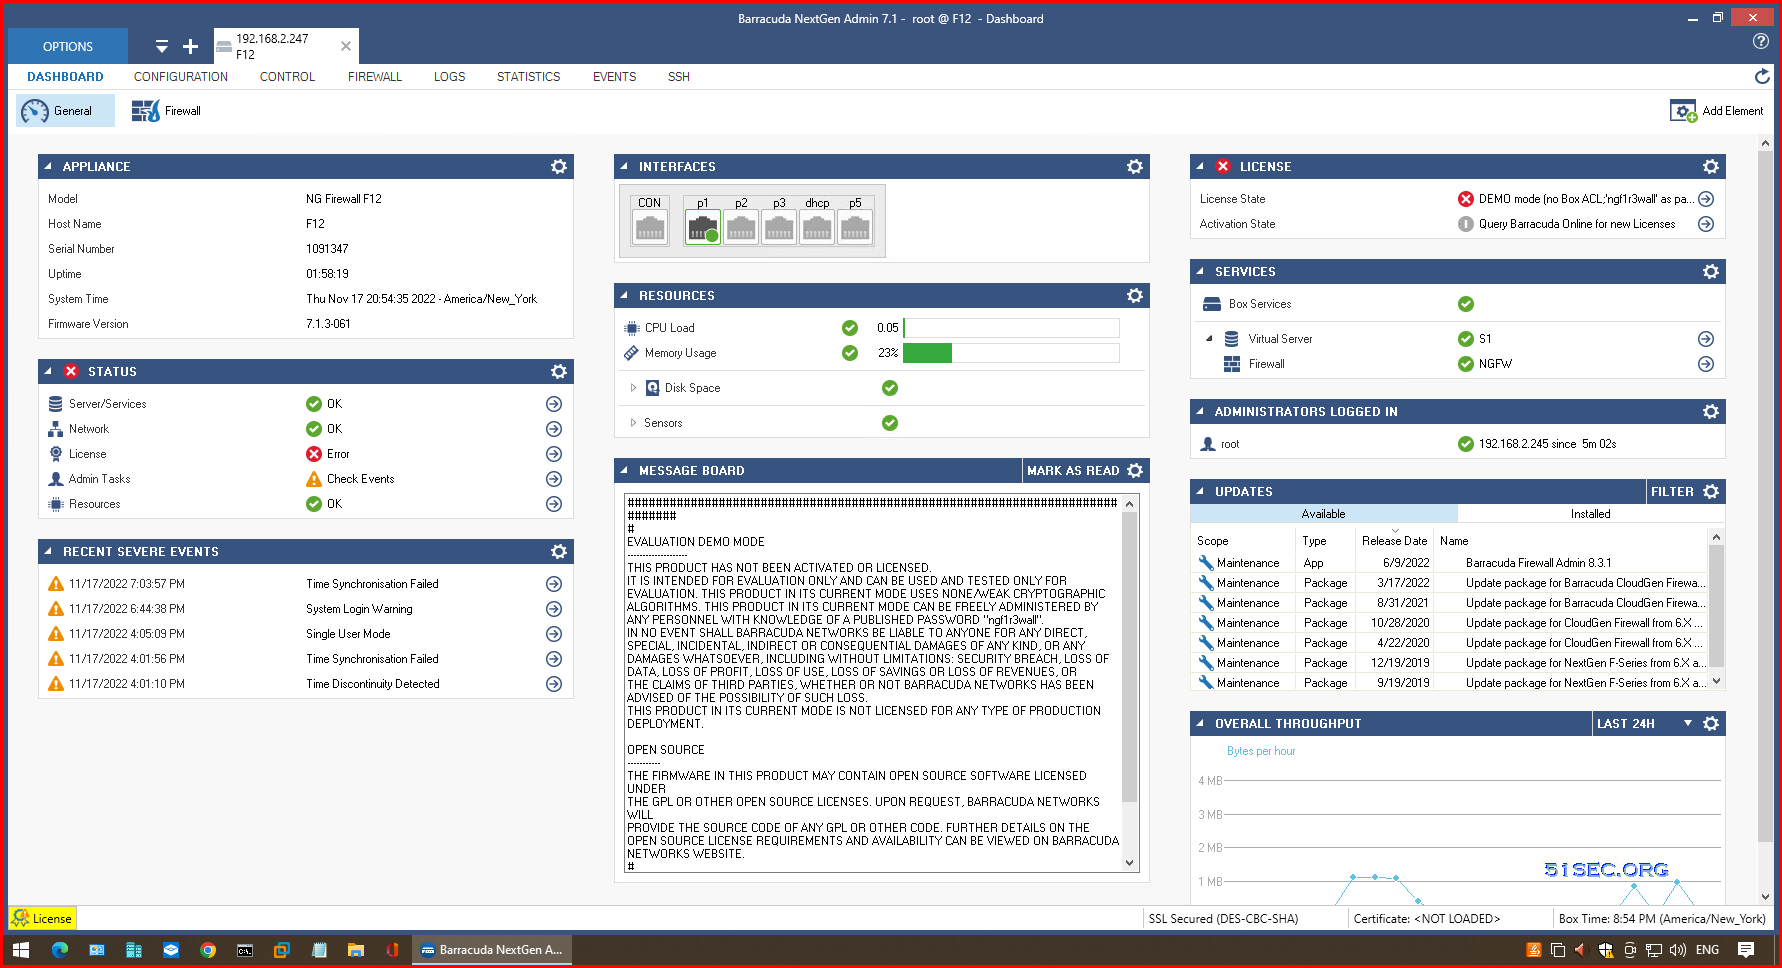
Dashboard:
Update System Firmware
Before version 8.0, you always can upgrade directly select the hotfix/patches to download and install. System will automatically apply hotfixes / patches then reboot it if needed.
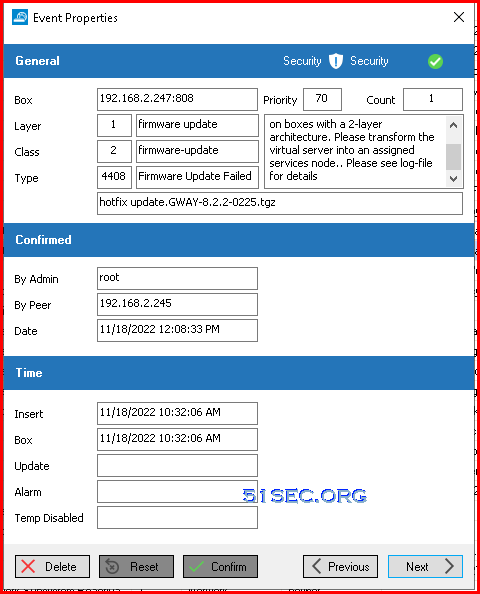
But to upgrade to version 8.0+ , you might get following error message in events:
"
ERROR: Box has a virtual server. This package can only be installed on boxes with a 2-layer architecture. Please transform the virtual server into an assigned services node.. Please see log-file for details
"
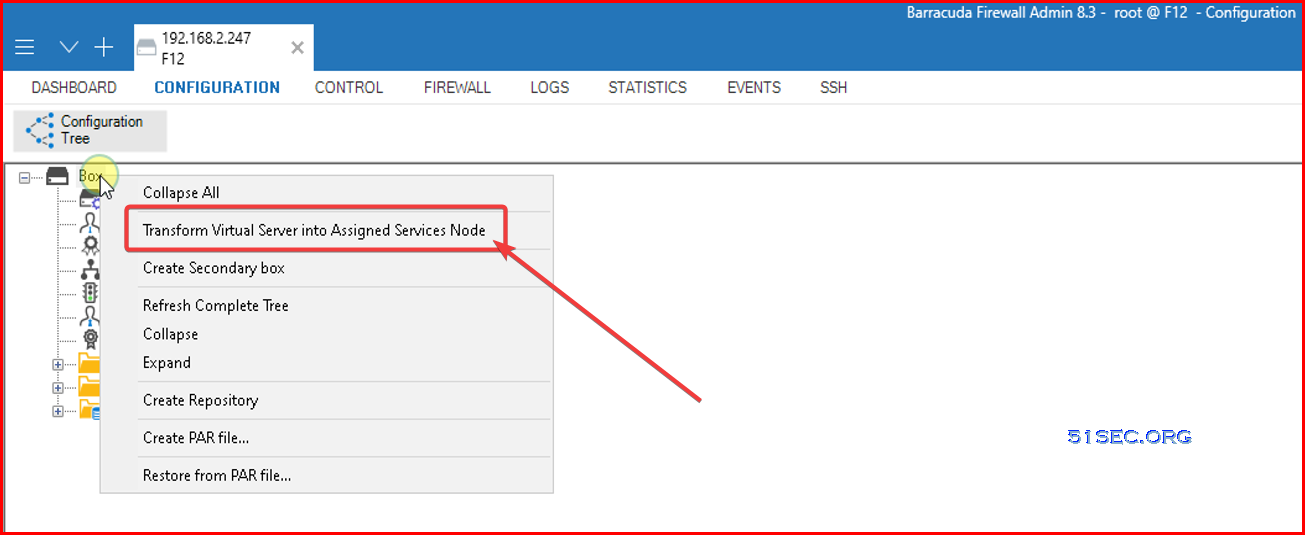
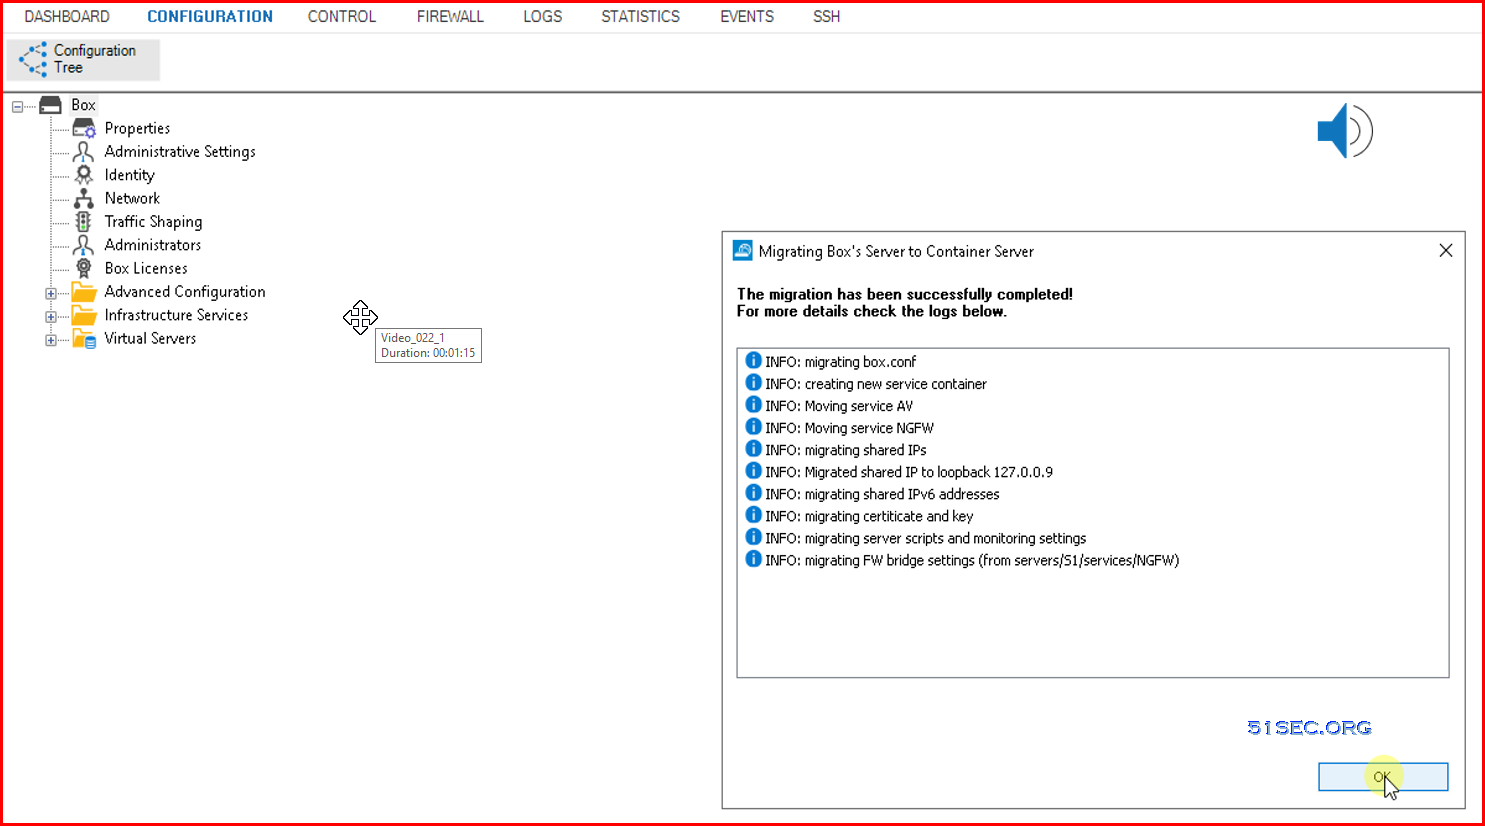
You will need to transform this box from Virtual Server into Assigned Services node.
After this step, you should be able to upgrade your Box's firmware to latest.
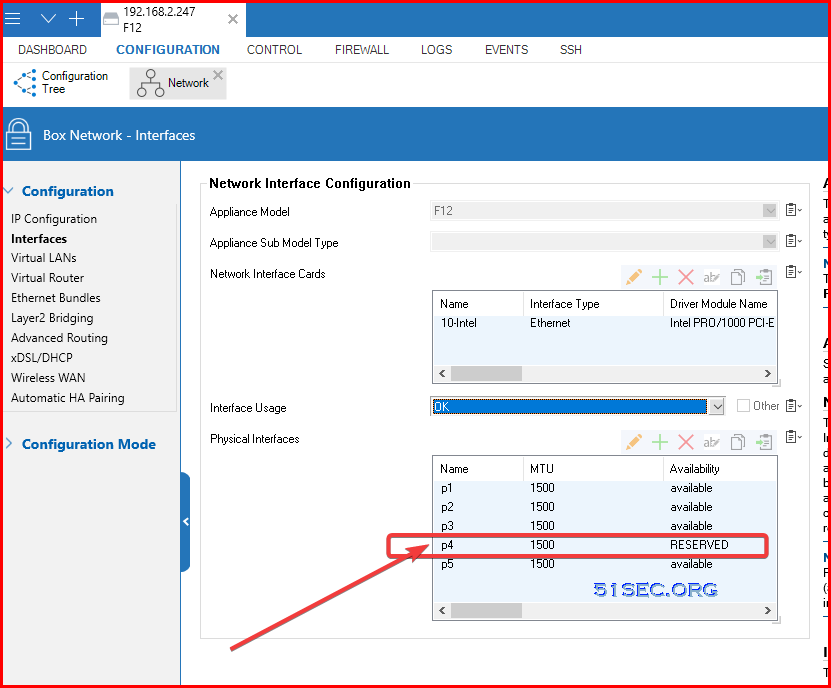
Change P4's Mode
Note: if your Barracuda Firewall Admin can not enter into unlock mode, or your lock button is greyed out, you might want to plug a cable into P4 to active the interface first.
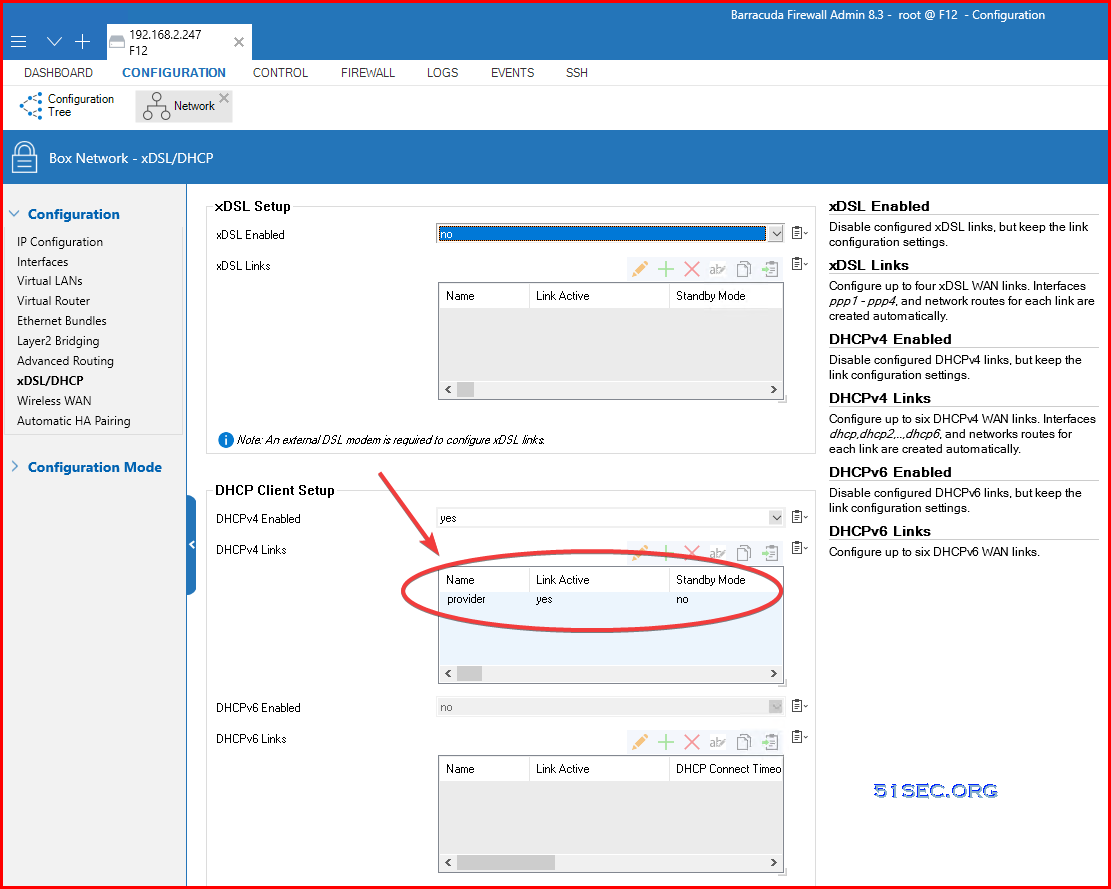
Here are some steps to change it to static:
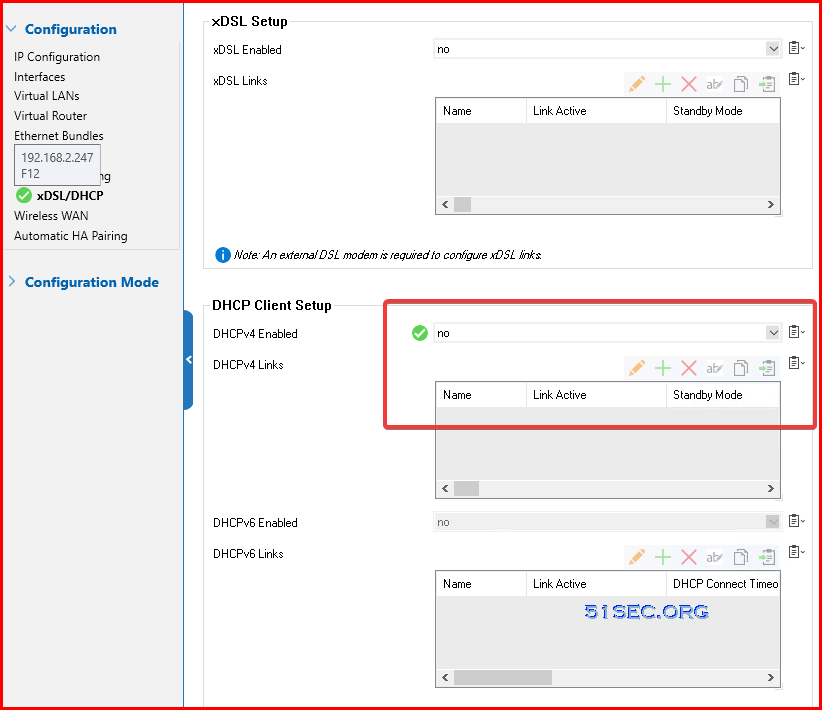
Configuration Tree - Network - xDSL/DHCP
Remove configuration and disable DHCPv4.
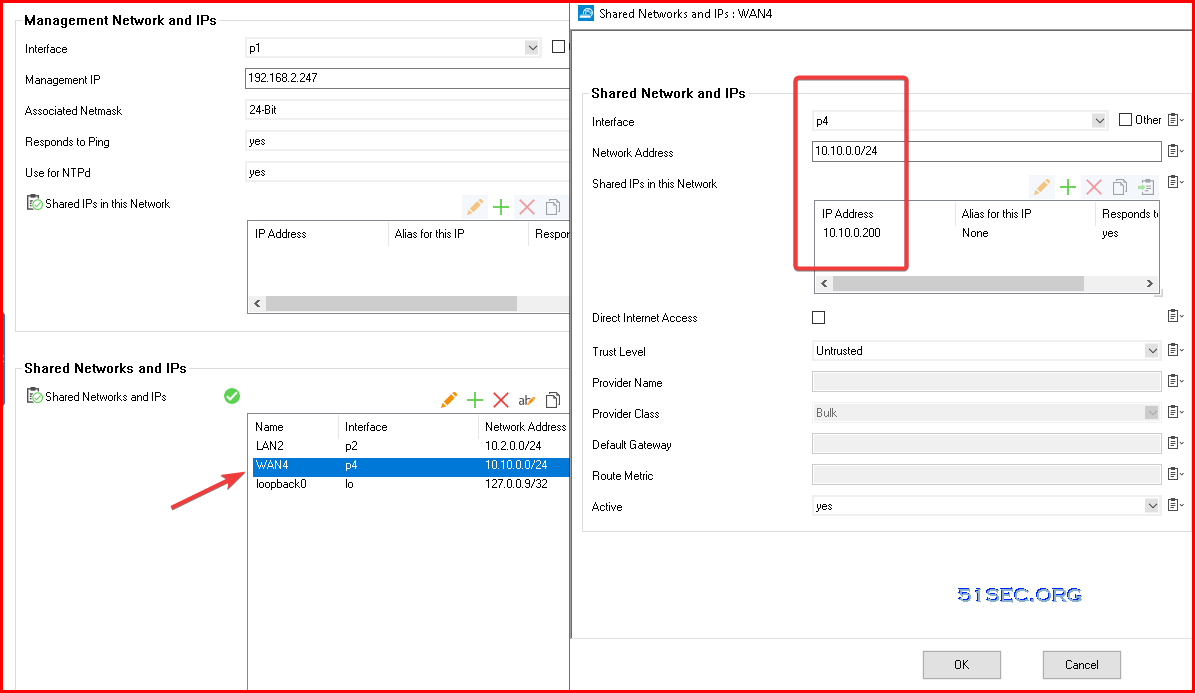
Configure a static ip address on P4:
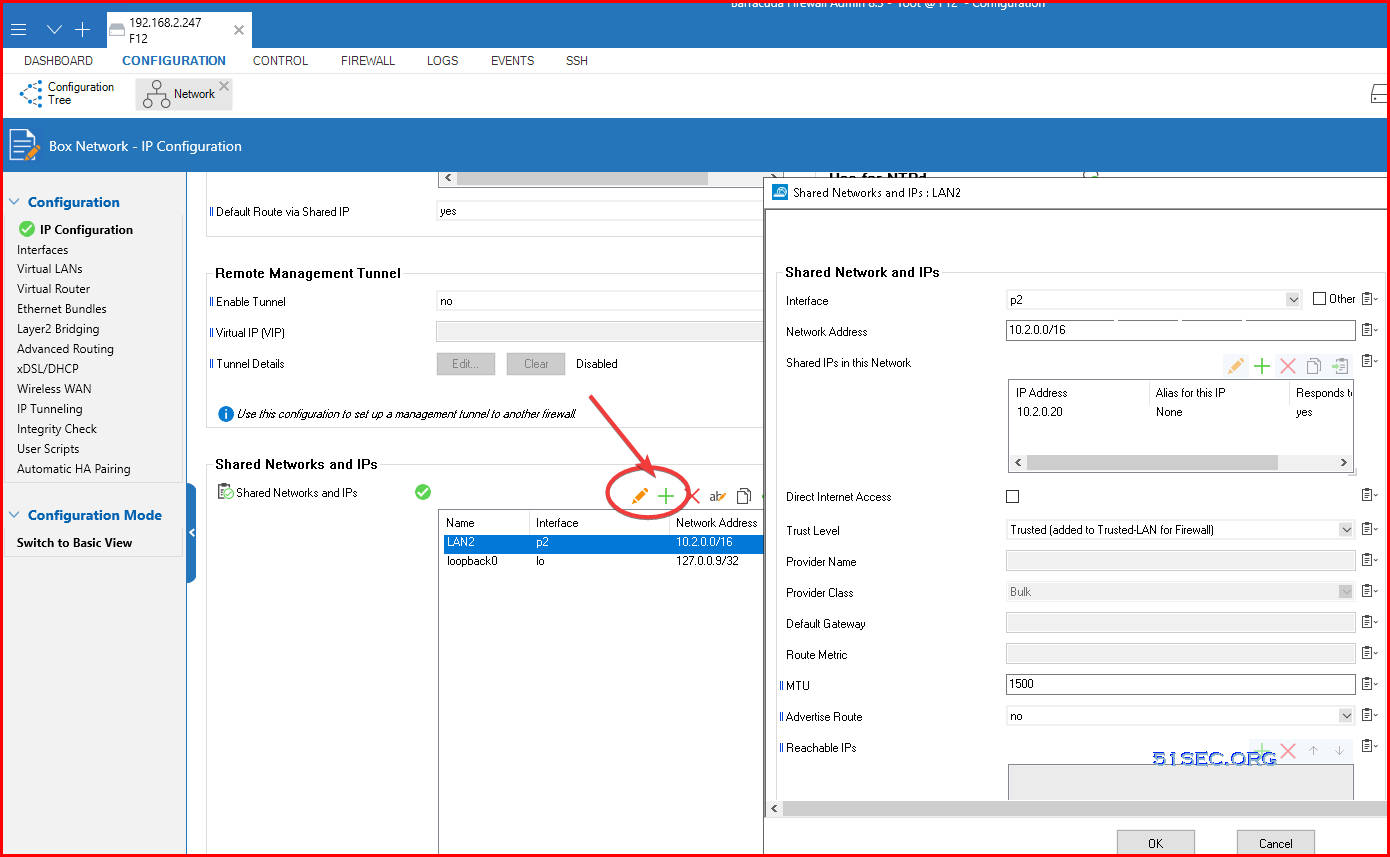
Configure Port IP Address
Configuration Tree - Network - IP Configuration - Shared Networks and IPs
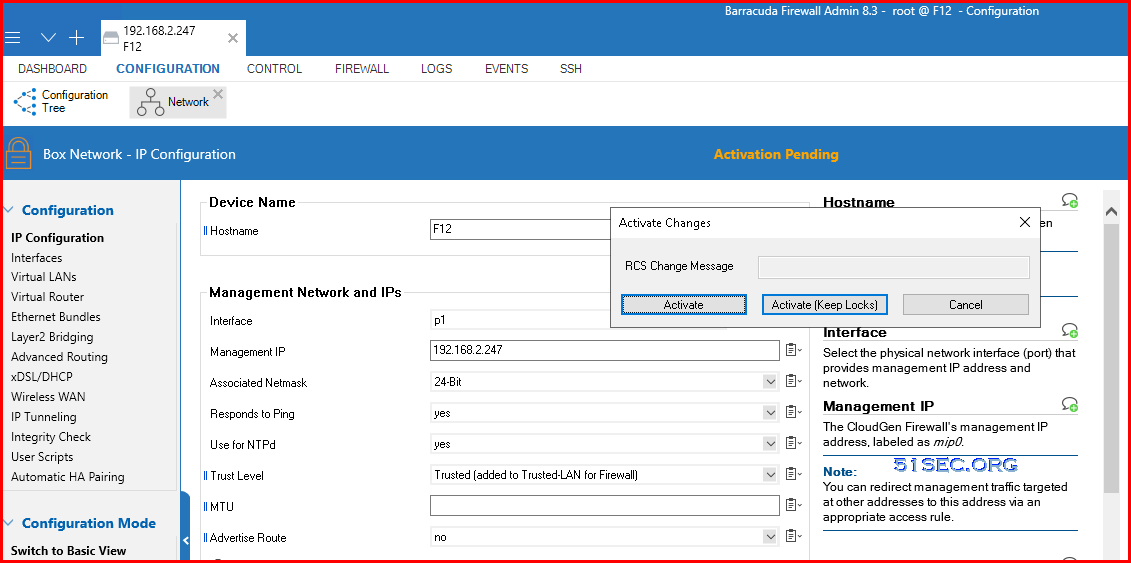
After finished configuration - > Send Changes , you will get an Activation Pending on top of your page. Click it, then click Activate.
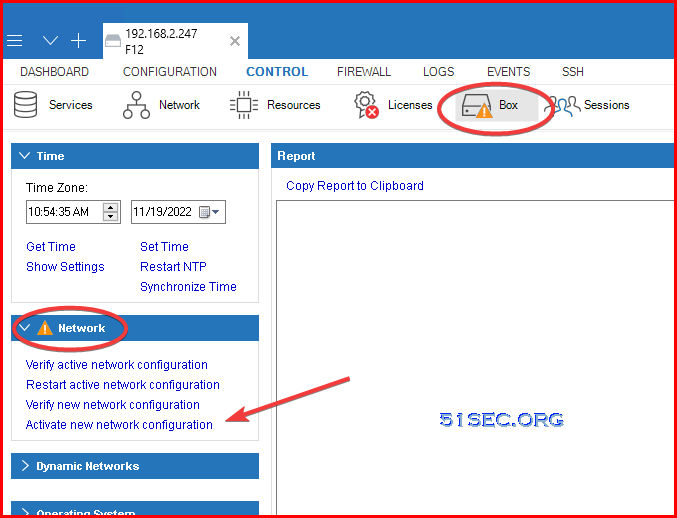
After this step, Your Box will get an alert icon to notifiy to activate this new network configuration:
Click it and click activate now. Wait a couple of seconds this configuration applied then the alert icon will disappear. You will get an Activation Succeeded message.


No comments:
Post a Comment