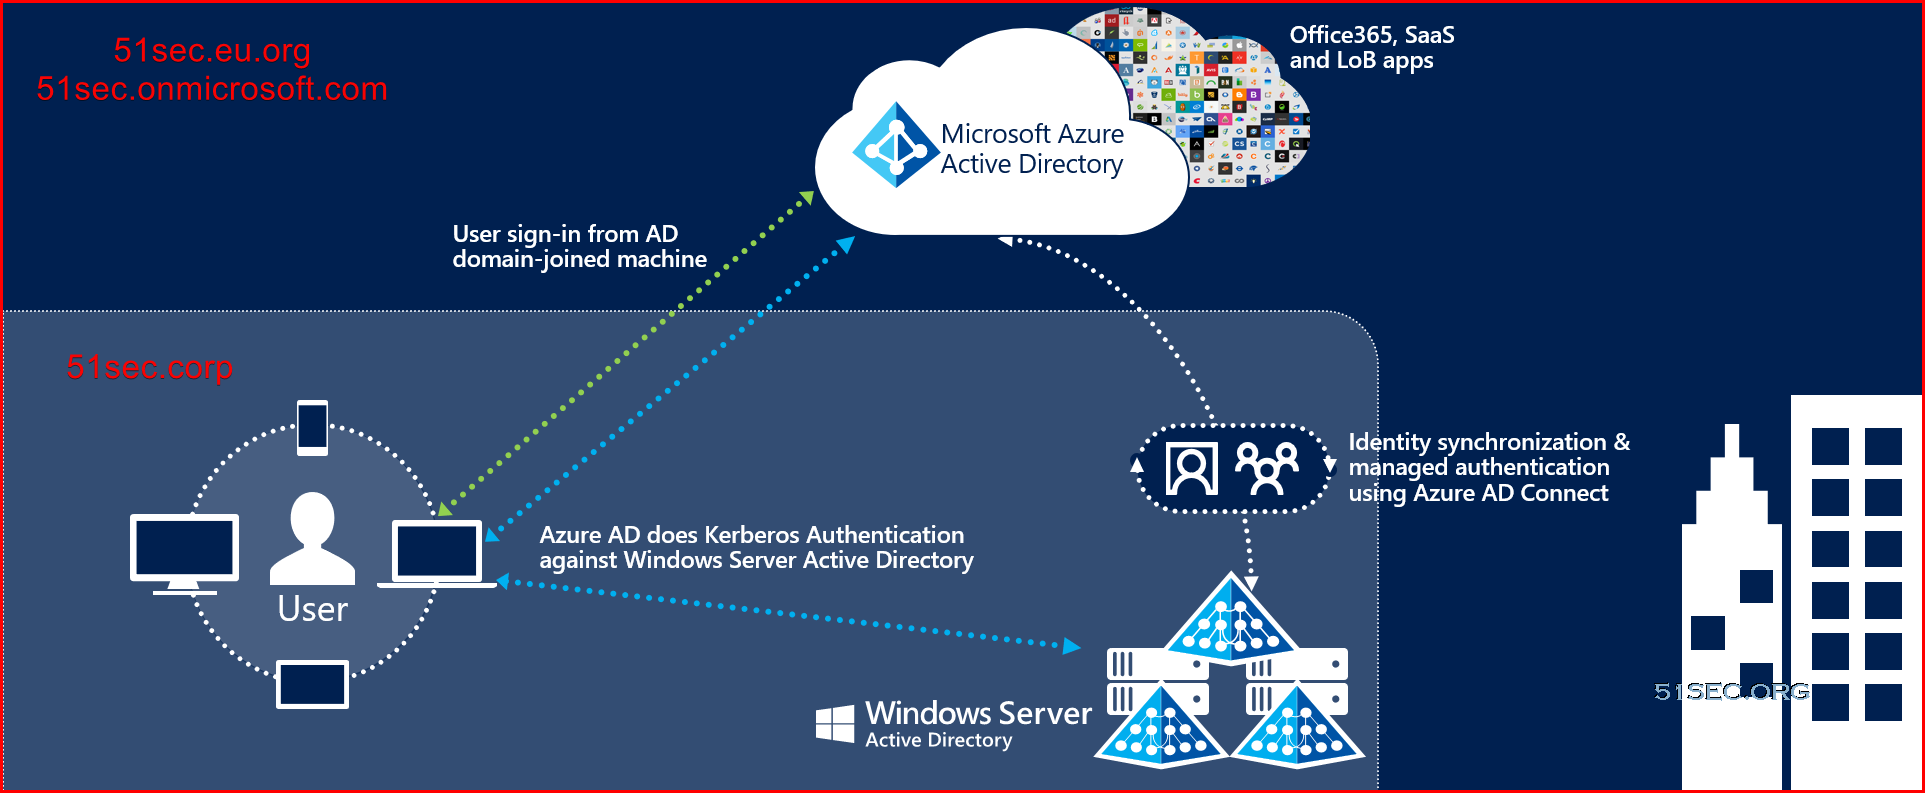
Azure AD Connect synchronizes your users' UPN and password so that users can sign in with the same credentials they use on-premises. However, Azure AD Connect only synchronizes users to domains that are verified by Microsoft 365. This means that the domain also is verified by Azure AD because Microsoft 365 identities are managed by Azure AD. In other words, the domain has to be a valid Internet domain (such as, .com, .org, .net, .us). If your internal AD DS only uses a non-routable domain (for example, ".local"), this can't possibly match the verified domain you have for your Microsoft 365 tenant. You can fix this issue by either changing your primary domain in your on-premises AD DS, or by adding one or more UPN suffixes.
Prepare for Microsoft Azure Active Directory
Azure Active Directory is needed to perform several configuration steps when installing Microsoft 365. These steps are performed using Windows PowerShell. However, before you can use PowerShell to access Azure AD, you must first install the Windows PowerShell modules that enable you to access Azure AD through PowerShell. In this task, you will prepare for using Azure AD by installing those PowerShell modules.
Open Windows PowerShell by performing the following steps:
Select the magnifying glass (Search Windows) icon on the taskbar at the bottom of the screen and type powershell in the Search box that appears.
In the menu that appears, right-click on Windows PowerShell and select Run as administrator in the drop-down menu.
In Windows PowerShell, type the following command and then press Enter:
Install-Module MSOnlineIf you are prompted to install the NuGet provider, enter Y to select [Y] Yes. Press Enter key.
If you are prompted to install the module from PSGallery, enter A to select [A] Yes to All. Press Enter key.
Once the installation is complete, the screen will return to the Windows PowerShell command prompt.
You must then run the following command to install the Azure AD PowerShell module that you just retrieved in the earlier step:
Install-Module AzureADPreviewIf you are prompted to confirm that you want to execute this command, enter A to select [A] Yes to All.
You have now installed the Windows PowerShell modules required to access Azure AD.
Remain logged into the domain controller VM and keep the Windows PowerShell window open.
Configure your UPN (User Principle Name) suffix
We can solve the ".local" or ".corp" (local non-routable domain) problem by registering a new UPN suffix or suffixes in AD DS to match the domain (or domains) you verified in Microsoft 365.
If a domain is non-routable, the default routing domain—for example, 51sec.onmicrosoft.com—should be used for the Office 365 UPN suffix.
After you register the new suffix, you update the user UPNs to replace the ".local" with the new domain name, for example, so that a user account looks like billa@contoso.com.
After you have updated the UPNs to use the verified domain, you are ready to synchronize your on-premises AD DS with Microsoft 365.
One quick and easy way to do is to use Powershell commands:
- On one of 51sec.corp's domain machines, log on as 51sec.corp\Administrator or any other domain admin user.
- Using Windows PowerShell as administrator, update the UPN suffix for the domain and on the UPN on every user in AD DS with “@51sec.onmicrosoft.com” (where 51sec is your unique UPN name in your cloud azure AD) for the domain name. To do this, run the following command (remember to change 51sec to your unique UPN name):
Set-ADForest -identity "51sec.corp" -UPNSuffixes @{replace="51sec.onmicrosoft.com"}Get-ADUser –Filter * -Properties SamAccountName | ForEach-Object { Set-ADUser $_ -UserPrincipalName ($_.SamAccountName + "@51sec.onmicrosoft.com" )}Set-ExecutionPolicy Unrestricted
Another way is through AD administration tolls:
Step 1: Add the new UPN suffix**
On the AD DS domain controller, in the Server Manager choose Tools > Active Directory Domains and Trusts.
Or, if you don't have Windows Server 2012
Press Windows key + R to open the Run dialog, and then type in Domain.msc, and then choose OK.
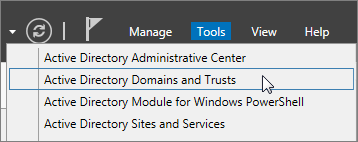
In the Active Directory Domains and Trusts window, right-click Active Directory Domains and Trusts, and then choose Properties.
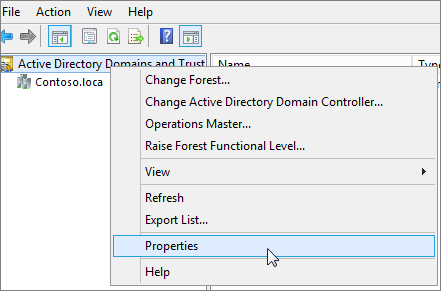
On the UPN Suffixes tab, in the Alternative UPN Suffixes box, type your new UPN suffix or suffixes, and then choose Add > Apply.

Choose OK when you're done adding suffixes.
Step 2: Change the UPN suffix for existing users
On the AD DS domain controller, in the Server Manager choose Tools > Active Directory Users and Computers.
Or, if you don't have Windows Server 2012
Press Windows key + R to open the Run dialog, and then type in Dsa.msc, and then click OK
Select a user, right-click, and then choose Properties.
On the Account tab, in the UPN suffix drop-down list, choose the new UPN suffix, and then choose OK.
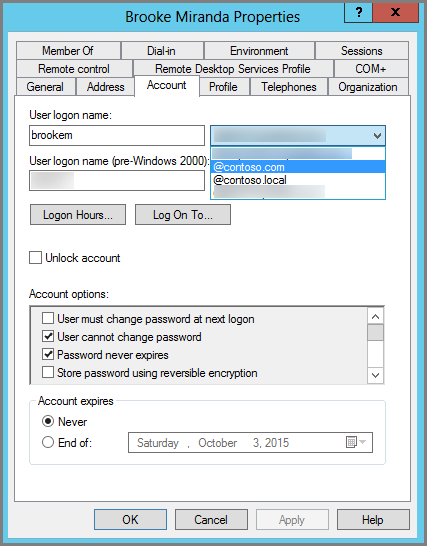
Complete these steps for every user.
Download and Install Azure AD Connect
Download link: https://www.microsoft.com/en-us/download/details.aspx?id=47594Custom installation of Azure Active Directory Connect:
Express settings
On the Express Settings page, select Customize to start a customized-settings installation. The rest of this article guides you through the custom installation process. Use the following links to quickly go to the information for a particular page:
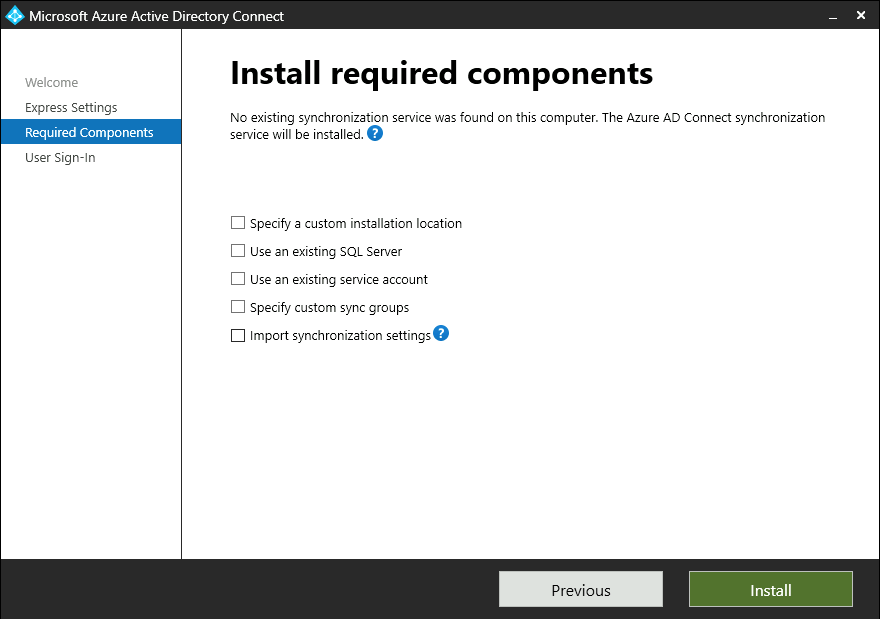
Install required components
When you install the synchronization services, you can leave the optional configuration section unselected. Azure AD Connect sets up everything automatically. It sets up a SQL Server 2019 Express LocalDB instance, creates the appropriate groups, and assign permissions. If you want to change the defaults, clear the appropriate boxes. The following table summarizes these options and provides links to additional information.
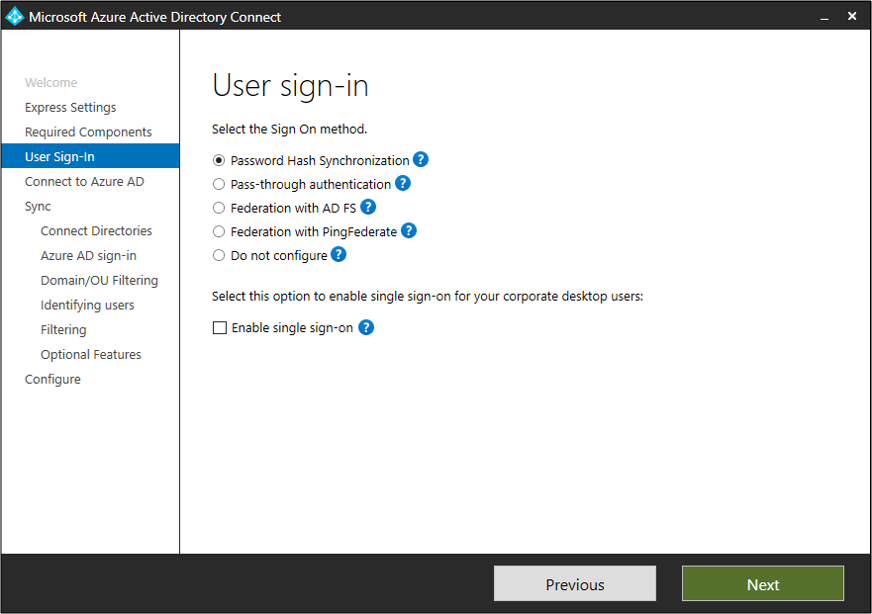
User sign-in
After installing the required components, select your users' single sign-on method. The following table briefly describes the available options. For a full description of the sign-in methods, see User sign-in.
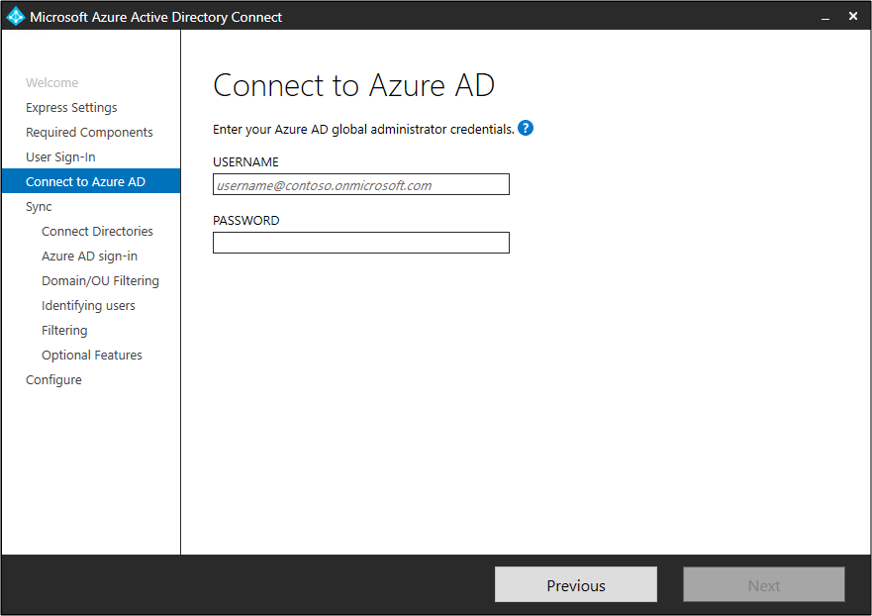
Connect to Azure AD
On the Connect to Azure AD page, enter a global admin account and password. If you selected Federation with AD FS on the previous page, don't sign in with an account that's in a domain you plan to enable for federation.
You might want to use an account in the default onmicrosoft.com domain, which comes with your Azure AD tenant. This account is used only to create a service account in Azure AD. It's not used after the installation finishes.
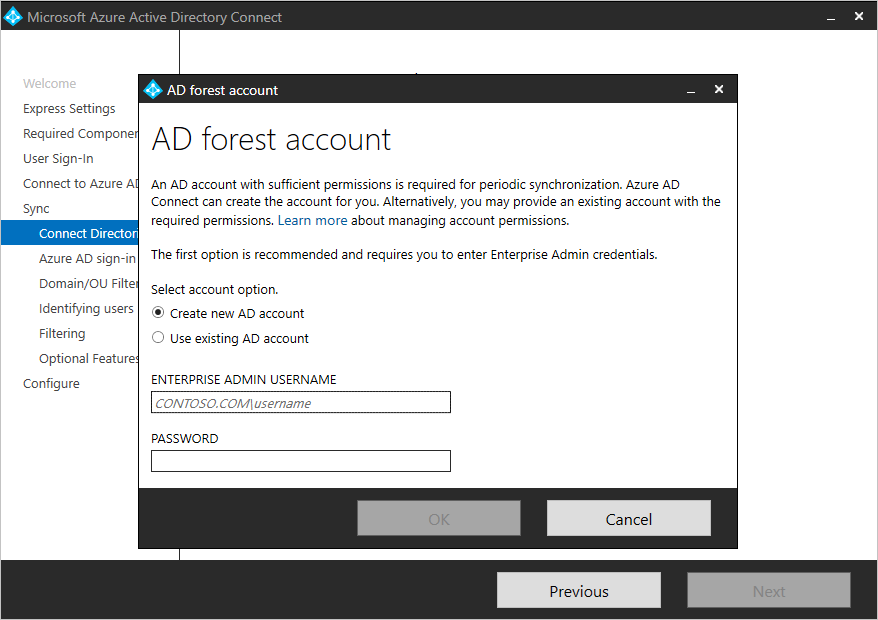
Connect your directories
To connect to Active Directory Domain Services (Azure AD DS), Azure AD Connect needs the forest name and credentials of an account that has sufficient permissions.

Note
As of build 1.4.18.0, you can't use an enterprise admin or domain admin account as the Azure AD DS connector account. When you select Use existing account, if you try to enter an enterprise admin account or a domain admin account, you see the following error: "Using an Enterprise or Domain administrator account for your AD forest account is not allowed. Let Azure AD Connect create the account for you or specify a synchronization account with the correct permissions."
Azure AD sign-in configuration
On the Azure AD sign-in configuration page, review the user principal name (UPN) domains in on-premises Azure AD DS. These UPN domains have been verified in Azure AD. On this page, you configure the attribute to use for the userPrincipalName.

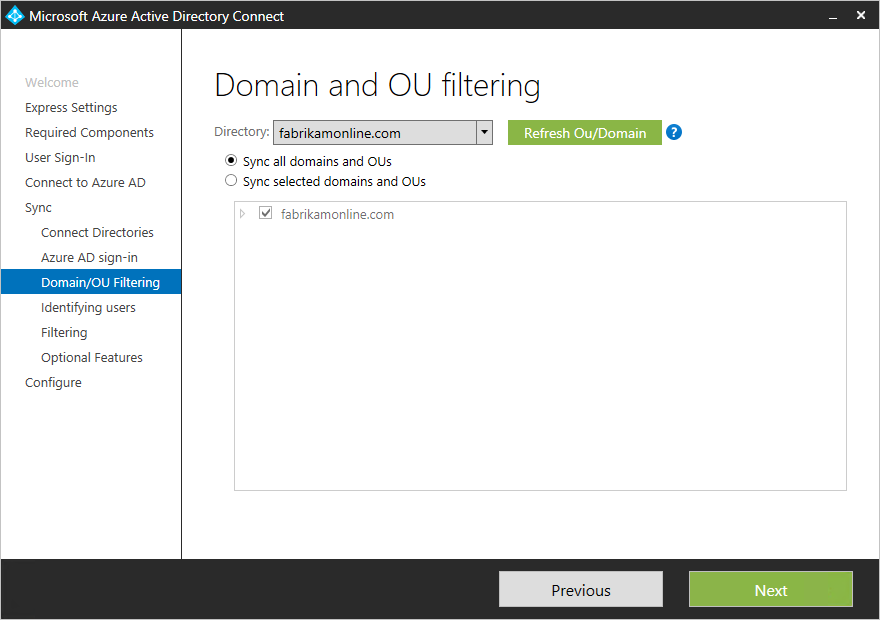
Domain and OU filtering
By default, all domains and organizational units (OUs) are synchronized. If you don't want to synchronize some domains or OUs to Azure AD, you can clear the appropriate selections.
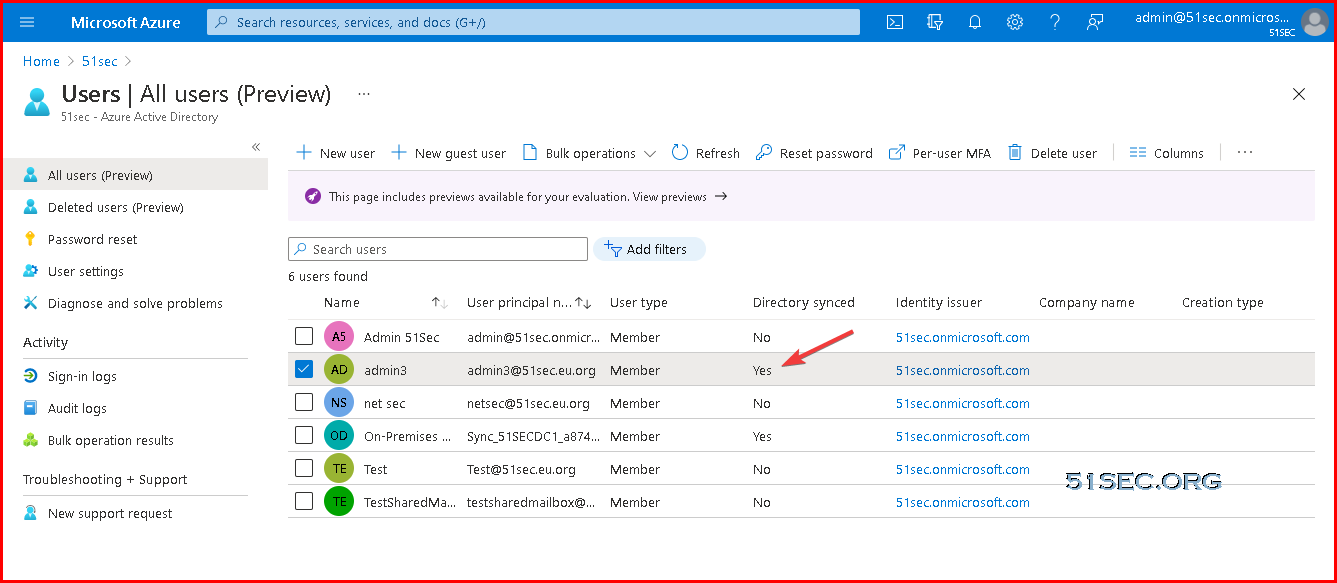
Verify through Azure AD Users
AD & AAD User Confliction
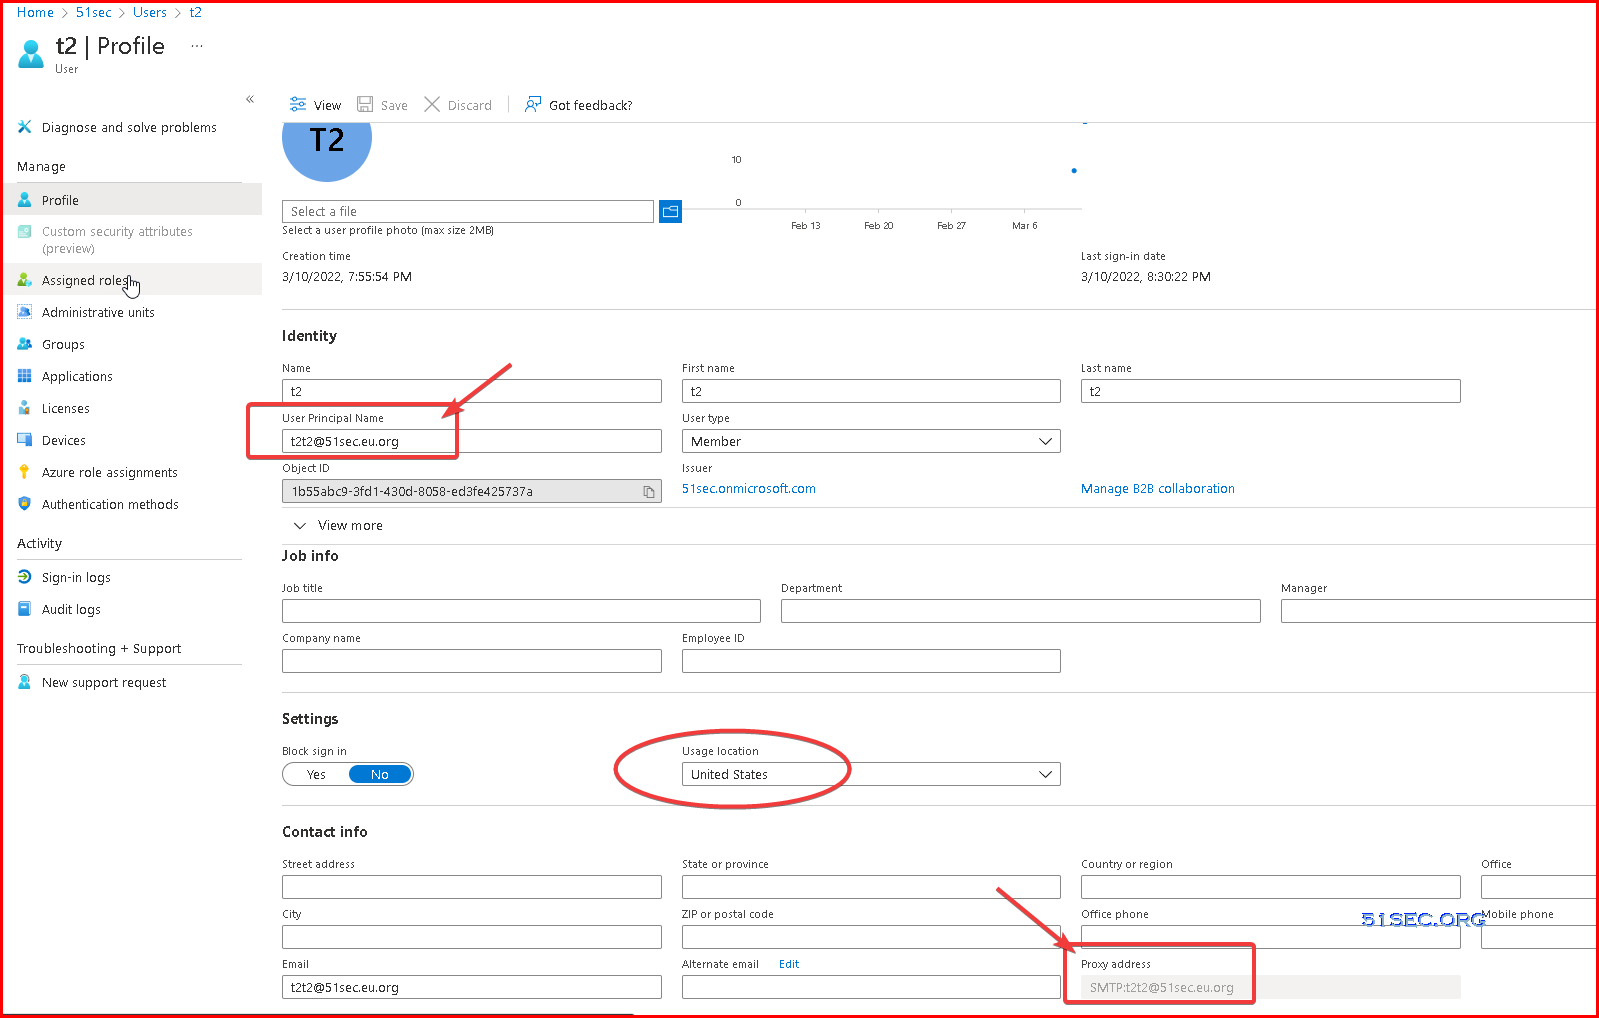
When you install Azure AD Connect and you start synchronizing, the Azure AD sync service (in Azure AD) does a check on every new object and tries to find an existing object to match. There are three attributes used for this process: userPrincipalName, proxyAddresses, and sourceAnchor/immutableID. A match on userPrincipalName and proxyAddresses is known as a soft match. A match on sourceAnchor is known as hard match. For the proxyAddresses attribute only the value with SMTP:, that is the primary email address, is used for the evaluation.
The match is only evaluated for new objects coming from Connect. If you change an existing object so it is matching any of these attributes, then you see an error instead.
If Azure AD finds an object where the attribute values are the same for an object coming from Connect and that it is already present in Azure AD, then the object in Azure AD is taken over by Connect. The previously cloud-managed object is flagged as on-premises managed. All attributes in Azure AD with a value in on-premises AD are overwritten with the on-premises value. (Sync with existing users in Azure AD)
Here is an example.
In Cloud, there is existing t2t2@51sec.eu.org account. Password is PasswordT2. Make sure assign O365 license and sent / received a couple of emails.
In on prem AD, create another user as t2t2 with UPN set to t2t2@51sec.eu.org. Password is PasswordT2T2
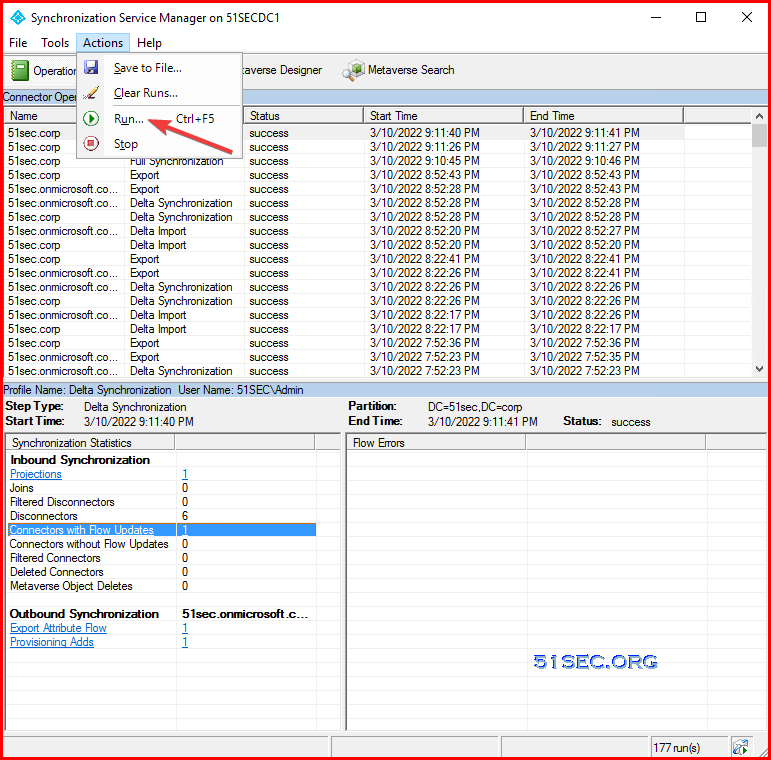
Manual Sync using Synchronization Service Manager installed on On-Prem DC to run a full sync:
Verify from AAD users:
Directory synced status will change from no to Yes. All other properties will be copied from AD to AAD. Password also changed to AD password, not AAD password anymore. Outlook emails still is AAD one, all previous emails kept.
Troubleshooting
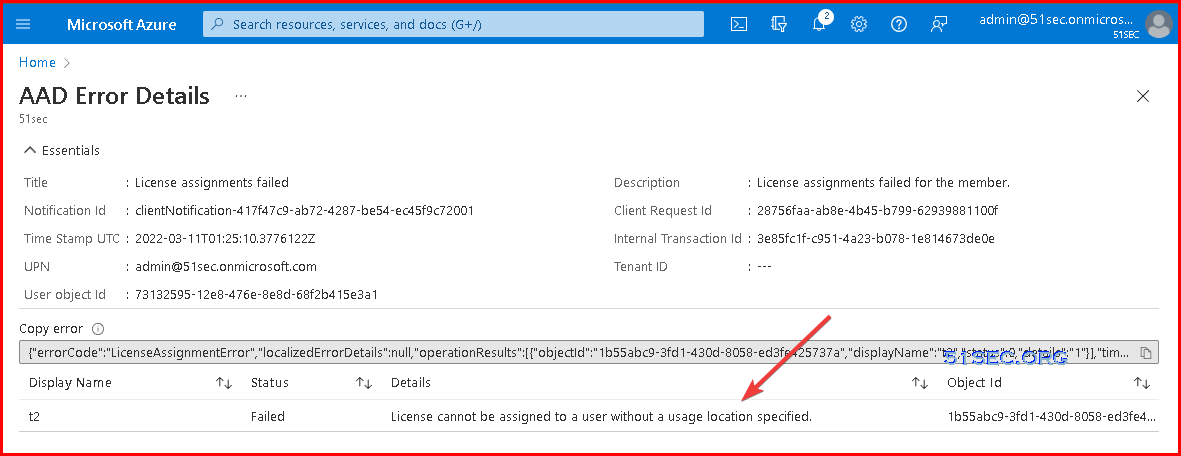
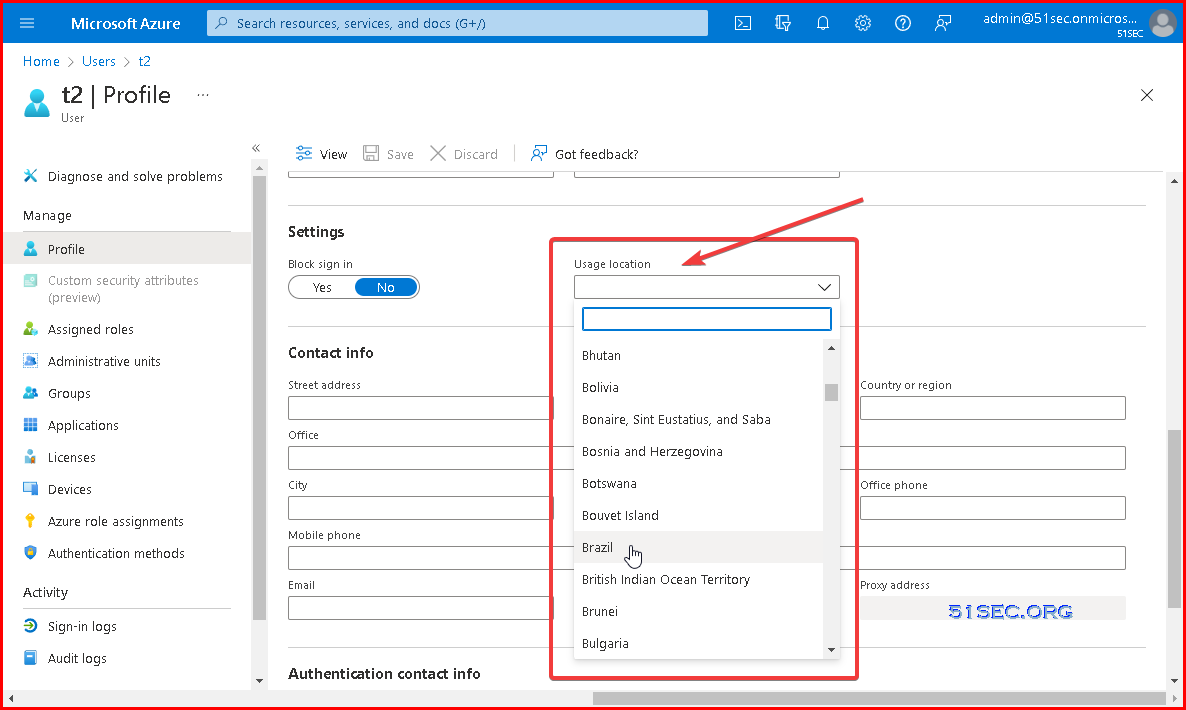
1. License assigning error
Edit user properties and assign a country to this user. Issue should be resolved.
2. SourceAnchor Change Is Not Allowed
For instance, when you want to change the source anchor from objectGUID to mS-DS-ConsistencyGuid for your Hybrid Identity implementation, you will be told since ms-ds-consistencyguid attribute is already in use in active directory forest, it is not changeable.
 I'
I'
Solution: Uninstall AZure ADConnect and Reinstall it without using Express Settings.





No comments:
Post a Comment